Wednesday, April 13, 2016

Kiddo's Peanut Butter Frosting

 Welcome to the letter K!  :-)

Ingredients:
1 1/2 sticks butter, softened
2 cups powdered sugar
1/2 cup peanut butter


Directions: With a stand mixer or a hand mixer with a whisk attachment, beat butter and sugar until creamy. Add peanut butter and beat until frosting forms.


Don't miss a thing! Subscribe to Home to 4 Kiddos by Email and get our posts sent right to your inbox!

Tuesday, April 12, 2016

TOS Review- HomeschoolDiploma.com


Today I am reviewing the Exclusive High School Diploma from HomeschoolDiploma.com.


Exclusive High School Diploma Review

It is not quite sinking in that Kiddo #1 is graduating high school this year.  It got a little more real when I was contacted with the opportunity to review this beautiful fully customized diploma.  Kiddo sat right next to me and was able to select everything to make the diploma special and unique.  Isn't that one of the best parts of homeschooling-- to customize the entire educational experience to our student's needs, abilities and interests?  Kiddo and a group of other soon-to-be homeschooled graduates have been meeting to organize and put together their own commencement.  He even asked his grandfather to be the keynote speaker!  How appropriate, therefore, that he be able to choose his own diploma and personalize it just the way he would like.

With the Exclusive High School Diploma, there are four wording options (both secular and religious), two kinds of paper to choose from, four different engraved seals from which to select and different choices for how the student's name is to be printed.  There are even 8 different choices of signature lines for the bottom.  In addition, you choose the color of the padded cover.  Everything to make the diploma as unique and special as your graduate.  There are many additional options and customizations available.


A family-owned and operated company, HomeschoolDiploma.com not only sells these beautiful diplomas (there are other diplomas as well as the Exclusive), they offer cap and gowns, tassels, class rings, "senior" apparel, personalized graduation announcements, thank you cards, graduation gifts, keepsakes and photo items.  They are definitely your go-to one site for all of your homeschool graduation needs.  I know I will be purchasing some items from them before Kiddo's graduation in June.


To see the diplomas selected by my colleagues on the Schoolhouse Review Crew, be sure to click on the banner below.


Exclusive High School Diploma Review

Don't miss a thing! Subscribe to Home to 4 Kiddos by Email and get our posts sent right to your inbox!

Try a New Recipe Tuesday- April 12

It's time for another week of recipe sharing!  :-)


The most viewed post from last week's hop was:


In the first 6 spots below are my posts from the past week in my Blogging from A to Z series: F is for Fudge, G is for Glazed Apple Cookies, H is for Hungarian Butter Cookies, I is for Italian Pizzelles and J is for uncooked fruit Jam.  Come on over and check them out!  :-)


Don't miss a thing! Subscribe to Home to 4 Kiddos by Email and get our posts sent right to your inbox!

Uncooked Fruit *J*am

Welcome to Day 10 of my A to Z Blogging Challenge, the letter J.

A couple of years ago, my kids made delicious *J*am with their 4-H group.

Ingredients:
2 cups fruit- cleaned and mashed with skins removed. 


You can use any kind of fruit.  Kiddos 1, 2 and 4 chose peaches.  Kiddo #3 chose plums. Other children chose kiwi.
1/2 cup water
1/4 cup chia seeds
1/4 cup lemon juice
Grated lemon peel
1/4 cup sweetener (use either sugar, raw sugar, honey, agave syrup or any other sweetener you prefer.  we used agave syrup at the meeting)

Mix together water, chia seeds, lemon peel and sweetener.
Skin the fruit and mash.  Mix together with chia seed mixture


Put in container and eat on toast or add to smoothies or any other way you prfer.  You can keep this in the refrigerator for about 3-4 days.  It can be frozen  and will keep for months.  Thaw before using.

Enjoy!  We did!  :-)


Don't miss a thing! Subscribe to Home to 4 Kiddos by Email and get our posts sent right to your inbox!

Monday, April 11, 2016

*I*talian Pizzelles

Welcome to Day #9 in the A to Z Blogging Challenge, the letter *I*.

*I*talian Pizzelles

Everytime I post something about making homemade Italian Pizzelles, I get a lot of comments and email asking about them: what they are, how I make them, etc.  So, I thought that I would share my grandmother's recipe.  She has been gone 16 years now, but by continuing to make her "signature" recipes (I even use her pizzelle iron), I am passing on not only memories, but a legacy to the next generation.  :-)  And for those of you that have not had the pleasure of trying pizzelles (they are SO good!), they are a very light and thin Italian cookie.  It is time consuming to make them in the volume that I do (it usually takes me about 2- 2 1/2 hours from start to finish), but you can easily cut the recipe in half or even in thirds.  I make the whole recipe (which is several hundred pizzelles) for large family gatherings (Christmas, Easter, etc.) and they do tend to get consumed quickly.  :-)

Italian Pizzelles
12 eggs
27 tablespoons shortening (melt it before hand and let it cool)
30 tablespoons sugar
30 drops of anise oil (use a dropper) (anise oil can be purchased at any Italian market or online.  Do not use anise extract, which is completely different!)
4 cups flour

Beat eggs, sugar and anise oil first, then add the melted shortening, beat again.
Add flour, one handful at a time
When dough starts riding up beaters, stop and use a wooden spoon to finish mixing

Put some shortening on paper towel to grease the pizzelle iron on both sides.  Turn iron on.  Once hot, put small teaspoon of dough on each side and close for about 30 seconds.  Repeat. (over and over again, lol!)


They are truly a special and delicious treat that my family and friends always ask for and enjoy.


Don't miss a thing! Subscribe to Home to 4 Kiddos by Email and get our posts sent right to your inbox!

Saturday, April 9, 2016

*H*ungarian Butter Cookies

Welcome to day 8 of the A to Z Blogging Challenge-- the letter "H."

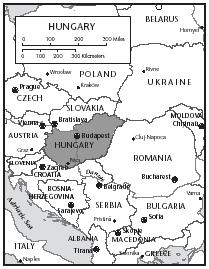
Earlier this school year, my kiddos were learning about Eastern Europe.

I thought it would be fun to make some recipes that are from the different countries they are learning about.  Tonight we made Hungarian Butter Cookies.  The recipe is courtesy of foodbycountry.com.


Ingredients:
2 3/4 cups flour
1 teaspoon baking powder
2/3 cup sugar
1/4 tsp. salt
1 cup butter, room temperature
1 egg
1/3 cup sour cream

Mix flour, baking powder, sugar and salt.  Add butter, mix by hand until it is like course meal.  Add egg and sour cream-- mix until it holds together-- cover and refrigerate for 2 hours.

Preheat oven to 350 degrees F.  Pinch off small egg-size pieces and form into balls.  Place on buttered or non-stick sheet about 2 inches apart.  Use fingers to press to about 1/2 inch thick.  Make a crosshatch by pressing back of fork on each cookie. 

Bake for 15-20 minutes until golden.


Enjoy!

My posts so far in this series:


and stayed tuned:  tomorrow is I is for Italian Pizzelles!  :-)


Linking up with the Gathering SpotKids in the Kitchen, Tasty TuesdayTempt my Tummy TuesdayDomestically Divine Tuesday, Raising Mighty Arrows,Addicted to RecipesHomemaking Wednesdays, Living Well WednesdayWisdom Wednesday , Favorite ThingsModest MomFull Plate Thursday and Show Off Friday and Tuesday's Table and Look What We Did and Titus 2sday Crafty SpicesBetter Mom,Create with JoyThursday's TreasuresTasty Thursdays and Wonderful Food Wednesday and the Chicken Chick and Creative Mondays and Try a New Recipe Tuesday


Don't miss a thing! Subscribe to Home to 4 Kiddos by Email and get our posts sent right to your inbox!

Friday, April 8, 2016

My Week in Review #55


How was your week?  We'd love for you to join us and share all about your adventures!  :-)


Don't miss a thing! Subscribe to Home to 4 Kiddos by Email and get our posts sent right to your inbox!